Tips for Crafting with Barn Wood
This video has no sound
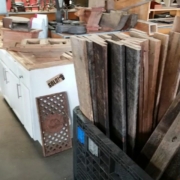
We have some pre-cut craft pieces of barn wood here at our Roanoke showroom, and we thought it would be a great time to get some advice from our Shop Manager, Patrick Hawks, about how to use this type of reclaimed material in your next project.
“So, I hear you want to work on with barn wood to make some type of furniture top. Here are the guidelines I tell my team here at the Black Dog Shop:
- First thing to be aware of is moisture content in the wood. We do not build with anything greater than 10% moisture content (you can read by a wood moisture meter).
- As for cleaning, it is best to use a wire brush so you can get down into the grooves to clean as best you can.
Sometimes they are cupped, and, in these cases, we cut them in half to lay them flat. - Afterward, we start the milling process (planing) on the bottom to create a flat surface, and this is also how we manage to keep all the boards at the same thickness.
- We always lightly sand our barn wood to de splinter and try to smooth the board a bit.
- As for the finish, it is important to coat all sides and better to brush on three good coats to ensure the top coat gets into all the lower cracks to create a sealed finished. Afterward, sand the clear coat and apply a finish using a spray gun for better result via an air compressor (if you don’t have access to a spray gun a brush will work). This material is very splintery when you begin the finishing process, so take your time to sand smooth all those places in order to create a splinter-free feel. We call this the blind test where we close our eyes and gently rub over the surface to feel for splinters.
- If all feels fine and you’re happy, sit back and enjoy.”
Thanks, Patrick! You can also use our pre-cut barn wood to make coat racks, decorative wall art, or anything you can dream up! And, as always, if you create something you would like to submit to our Maker of the Month competition, you can tell us the story behind your piece here.

