From Roadside Rescue to Fine Dining
by Susan “Swooz” Hudson, Black Dog Salvage artist-in-residence
I rarely do long distance design work. It is too difficult to work from photographs, zoom walk throughs, etc. Each “screen” will present colors differently. I like to be on site, see the room where the new furniture pieces are to be placed, feel the vibe, get to know the space, traffic flow, etc. But my friend, Jane, way out in California, twisted my arm and talked me into helping her.
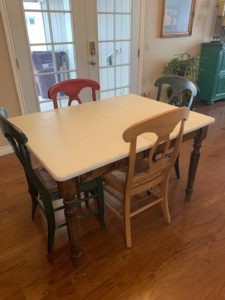
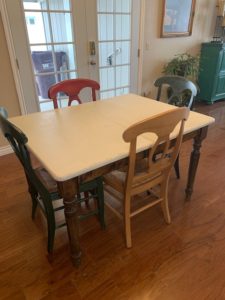
Jane had recently downsized from a much larger home. She didn’t have room for her big dining room table, so she sold it. She had 4 chairs from Pottery Barn, solid, but painted in four different colors. She had been cruising Facebook Marketplace in hopes of finding a table to go with them. She called on one and was told it was out at the curb – free if she wanted to pick it up. So, off she went.
She liked it, but it was a true “Roadside Rescue”! Solid farm style table with turned legs and a leaf. The top had been painted white, poorly I might add, but the legs and apron were unharmed and stained a neutral medium brown.
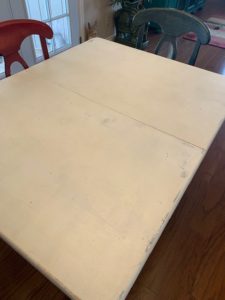
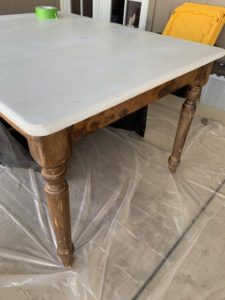
Jane called asking for design help. She wanted to know if there was any way she could pull the two together, her colorful chairs and the poorly painted, but FREE, table. I told her to send me pictures of the pieces and give me a few days to come up with a plan.
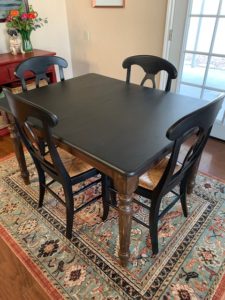
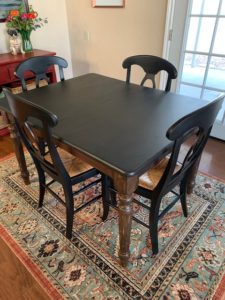
I suggested that she paint the chairs and tabletop in Black Dog Black, add some light distressing then “glaze” everything in Van Dyke Brown, including the table apron and legs. We were going for a rustic, but sophisticated look and the glaze would pull the whole look together.
Black furniture can come across as cold and stark. Jane wanted a warm, friendly look, but with an air of sophistication. She was a bit apprehensive about all the black. I explained that the glaze would unify the pieces and warm the black. The Van Dyke Brown glaze warms the starkness of the black, softening the look, giving it a rich finish.
She loved the idea! I agreed to direct the project, while she did the work. My direction was provided through emails, texts, lots of phone calls and photos. And guess what? It worked!
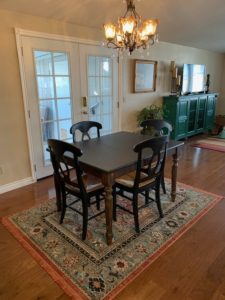
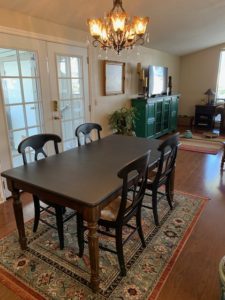
The result is a true showstopper. One would never guess that this now gorgeous table was once a cast-off, picked up from the side of the road! Jane receives compliments concerning her “NEW” dining room furniture from family and friends visiting her home. They always ask where she purchased the set! They are truly amazed when she tells them the story.
You, too, can achieve the same results. Here are the steps:
TABLE
- Strip the paint from the tabletop. The paint surface was rough with numerous scratched and scuffed areas. For the desired look it was better to start with a smooth, clean surface than to try to paint over the damage and uneven layers of paint.
Jane chose to use paint stripper since the table was covered in thick paint with gray primer underneath – trying to sand it off would have been a slower process. She was also working in her garage and didn’t want to have that paint “dust” covering everything.
- Clean with mineral spirits and sand the tabletop smooth. Finish with ultra-fine grit sandpaper.
- Thoroughly clean the entire table with TSP (Trisodium Phosphate).Wipe the table down. Do not let the cleaning solution stand on the bare wood. Allow to dry overnight.
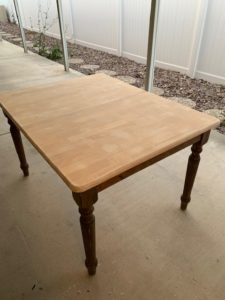
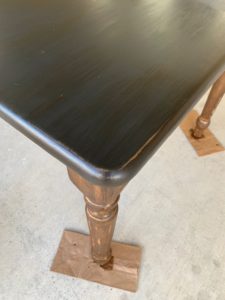
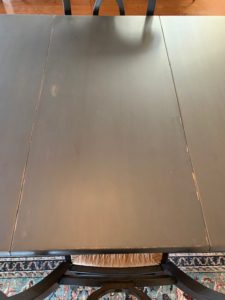
- Paint tabletop and leaf with BDSFP in Black Dog. Allow to dry for 2 hours, then distress. When distressing do not allow the paint to thoroughly cure or you will wear your arm out sanding. As soon as you can lay the palm of your hand down on the surface and not pick up any paint you may begin the distressing process. Lightly sand edges and “high traffic” areas for a gently worn, naturally aged look. Let the piece cure overnight.
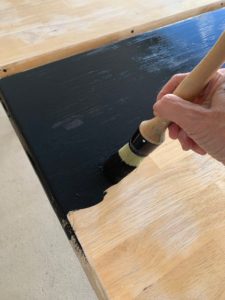
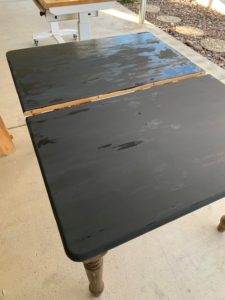
- Apply the glaze with the brush of your choice as you would paint and wipe off with a lint free cloth. Work in small sections.
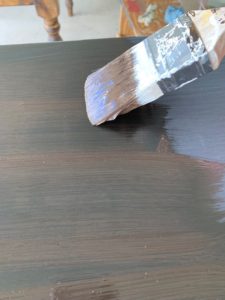
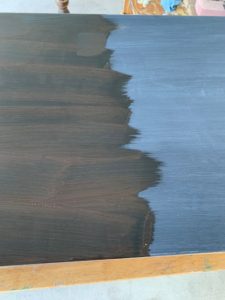
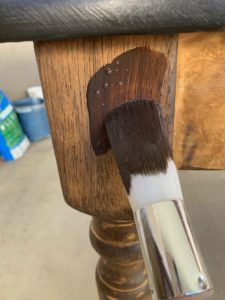
- Let dry overnight.
- Apply three coats of topcoat. Jane used Show Dog in the Matte sheen. Allow a day of dry time between each coat. Lightly sand and wipe clean between each new application.
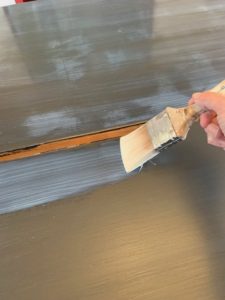
Note: The apron of the table was made from a different wood than the legs and consequently did not absorb the glaze like the legs.
In order to create a unified finish Jane applied a second of coat of glaze to the apron and did not wipe it off, just allowed it to dry. This technique worked. The color matched perfectly and the glaze dried to a smooth finish overnight.
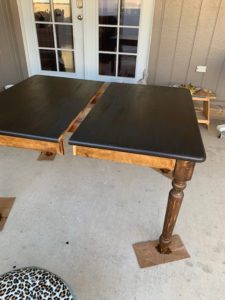
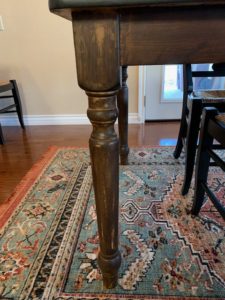
Once the piece was completely dry, she applied the topcoat to all parts of the table.
Chairs
Jane chose to spray the chairs instead of brushing them.
Either way is fine, but spraying is by far faster! If you spray, follow the recommendations outlined in the owner manual of your sprayer. Always use distilled water to thin the paint. Distilled water does not contain any chemicals or minerals that could clog your sprayer or alter the ph levels of the paint. Spraying does use more paint, so make sure you have plenty to complete the job.
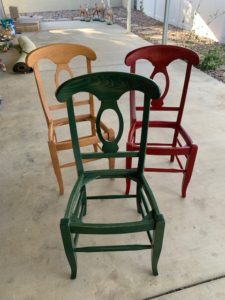
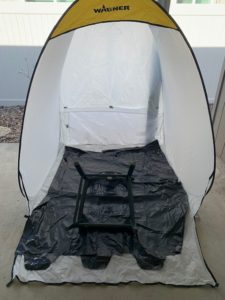
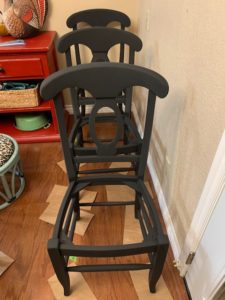
- Remove seats from the chairs.
- Thoroughly clean each chair from top to bottom with TSP
- Allow to dry overnight.
- Start with chairs upside down and paint the underside first. Always work bottom to top. This way you always finish with the right side UP.
- Turn chair upright and paint the rest.
- Allow to dry overnight (one coat should be enough, but you may need to make touchups here and there, spray a second coat if needed). Jane distressed the chairs lightly as soon as the paint was dry to the touch.
- Let dry overnight.
- Apply glaze to each chair and wipe off pushing the glaze into the paint. Again, work from the underside first, turn over and do the right side.
- Allow to dry overnight.
- Apply three coats of topcoat. Allow each coat to dry for 24 hours. Lightly sand and wipe clean before each new application.
- Reattach the seats.
While I admit I do not like long distance projects, this one turned out beautiful! Rich, warm, finish welcoming people to sit, converse, and break bread together. Solid pieces with a new finish providing them with a new life.
So, the next time you see a piece sitting on the curb, turn around, check it out, it could be your next painted success story!
